Weather App using only HTML CSS and JavaScript

🧠Data Structures and Algorithms | Python | Java | FullStack Development | Open Source

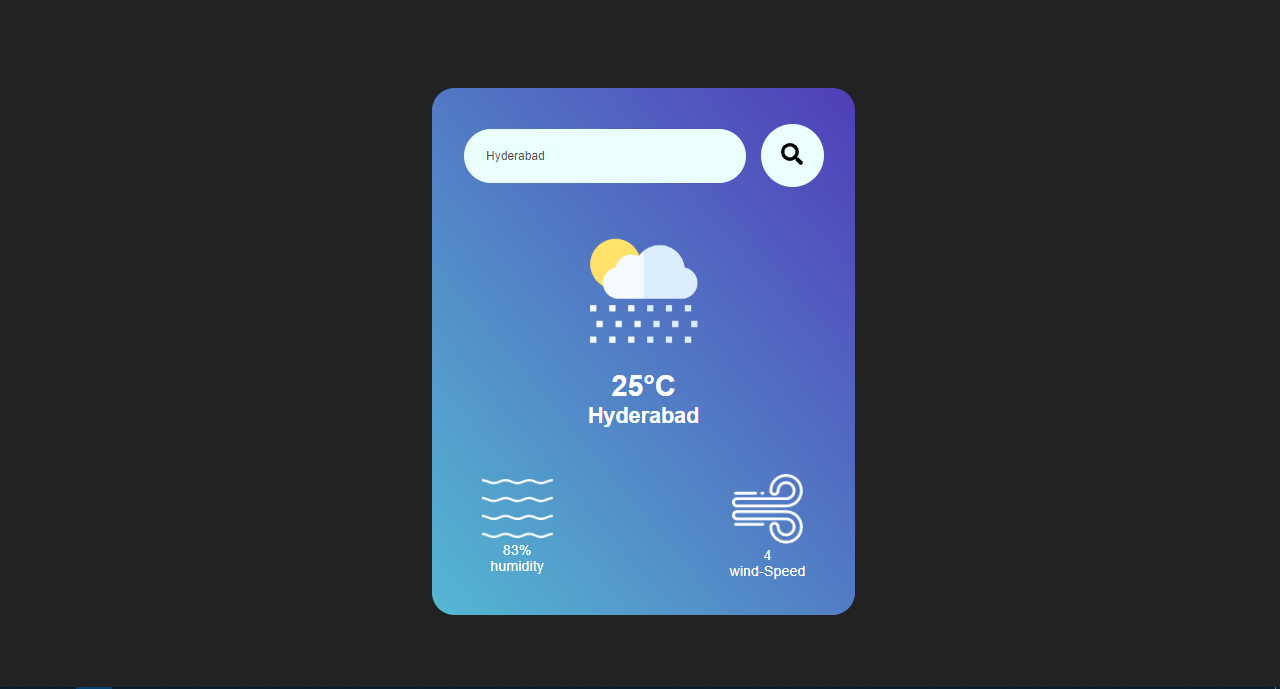
Here's how you can create a weather app just by using HTML CSS and Javascript:
In the modern digital age, convenience and information are at our fingertips. Weather is no exception – imagine being able to access real-time weather forecasts right from your web browser! In this blog post, we're about to demystify the inner workings of a weather web app. By merging HTML, CSS, and JavaScript, we'll create a stylish and functional weather app that displays weather details for a specific city. Let's embark on this coding journey together.
Setting the Scene
Our web app adventure begins with structuring the HTML. This foundational markup provides the canvas upon which our weather app comes to life.
<!DOCTYPE html>
<html lang="en">
<head>
    <meta charset="utf-8">
    <meta name="viewport" content="width=device-width, initial-scale=1">
    <title>Weather App</title>
    <link rel="stylesheet" href="style.css">
</head>
<body>
    <div class="card">
        <div class="search">
            <input type="text" id="cityName" spellcheck="true">
            <button> <img src="/Website/Assets/images/search.png" alt=""></button>
        </div>
        <div class="weather">
            <img src="/Website/Assets/images/rain.png" class="weather-icon">
            <h1 class="temp">22°C</h1>
            <h2 class="city">Radha Valley</h2>
            <div class="details">
                <div class="col">
                    <img src="/Website/Assets/images/humidity.png" alt="">
                    <div>
                        <p class="humidity">50%</p>
                        <p>humidity</p>
                    </div>
                </div>
                <div class="col">
                    <img src="/Website/Assets/images/wind.png" alt="">
                    <div>
                        <p class="wind">15km/ph</p>
                        <p>wind-Speed</p>
                    </div>
                </div>
            </div>
        </div>
    </div>

    <script src="weather.js"></script>
</body>
</html>
Breaking Down the HTML
The standard HTML structure sets the tone for the page.
The
<link>tag links an external stylesheet (style.css) for styling our app.Within the
<body>, we've laid out a structure comprising a search bar, weather display, and placeholder images/icons.An
<input>field is provided for users to enter the desired city name.A
<button>element adorned with a search icon offers a visual cue to initiate the search.The weather display area includes a weather icon, temperature, city name, and additional weather details.
Icons for humidity and wind are included, along with labels and placeholders for actual data.
Styling with CSS
To give our weather app a polished and visually appealing look, we use CSS to style the elements according to our design preferences.
Title: Mastering CSS: A Deep Dive into Styling a Weather App
Introduction
In the realm of web development, styling is the brush that paints the canvas of user interfaces. Cascading Style Sheets (CSS) hold the power to transform a mere collection of elements into a visually appealing and functional web application. In this blog post, we'll embark on an exciting journey through the lines of CSS code that bring life to a weather app. From defining the layout to crafting colors and alignments, you'll witness the magic that CSS can bestow upon a user interface.
CSS as the Artist's Palette
Our weather app's visual appeal begins with a global reset, ensuring a consistent starting point across browsers and devices.
*{
    margin: 0;
    padding: 0;
    font-family: sans-serif;
    box-sizing: border-box;
}
The universal selector
*selects all HTML elements and applies uniform styling.margin: 0; padding: 0;resets margins and padding to eliminate default spacing.font-family: sans-serif;ensures a readable font.box-sizing: border-box;alters the box model to include padding and border within the element's total width and height.
Setting the Stage: Background and Card Styling
body{
    background-color: #222;
}
.card{
    /* Styling for the card container */
}
background-color: #222;sets the backdrop to a dark shade, creating a dramatic ambiance.
Card Design and Layout
.card{
    /* ... */
    width: 90%;
    max-width: 470px;
    background: linear-gradient(50deg, #54b8d1, #503eb8);
    color: #fff;
    margin-top: 100px;
    margin-left: 480px;
    border-radius: 25px;
    padding: 40px 35px;
    text-align: center;
}
width: 90%; max-width: 470px;ensures the card remains responsive, adapting to various screen sizes.background: linear-gradient(50deg, #54b8d1, #503eb8);crafts a gradient background that adds vibrancy.color: #fff;sets the text color to white for high contrast.margin-top: 100px;pushes the card down from the top.margin-left: 480px;centers the card horizontally.border-radius: 25px;provides a subtle rounded corner effect.padding: 40px 35px;offers ample padding inside the card.text-align: center;centers the content within the card.
Search Bar Styling
.search{
    /* ... */
    display: flex;
    align-items: center;
    justify-content: space-between;
}
.search input{
    /* ... */
    border: 0;
    outline: 0;
    background: #ebfffc;
    color: #555;
    /* ... */
    border-radius: 30px;
}
.search button{
    /* ... */
    border: 0;
    outline: 0;
    background: #ebfffc;
    border-radius: 50%;
    /* ... */
}
display: flex; align-items: center; justify-content: space-between;arranges the input and button side by side.Input styling includes removing borders, setting background color, and providing a subtle text color.
border-radius: 30px;curves the input edges.Button styling eliminates borders, adds a background, and gives it a rounded appearance.
border-radius: 50%;transforms the button into a circular shape.
Visual Elements and Details
.weather-icon{
    /* ... */
    width: 170px;
    margin-top: 30px;
}
.weather-h1{
    /* ... */
    font-size: 80px;
    font-weight: 500;
}
.weather-h2{
    /* ... */
    font-size: 45px;
    font-weight: 400;
    margin-top: -10px;
}
.details{
    /* ... */
    display: flex;
    align-items: center;
    justify-content: space-between;
    padding: 0px 20px;
    margin-top: 50px;
}
width: 170px; margin-top: 30px;adjusts the weather icon size and provides spacing.font-size: 80px; font-weight: 500;increases the font size and emphasizes the temperature.font-size: 45px; font-weight: 400;defines the font size and weight for the city name.margin-top: -10px;shifts the city name slightly upwards.display: flex; align-items: center; justify-content: space-between;arranges the humidity and wind elements side by side.padding: 0px 20px;offers padding to the weather details.margin-top: 50px;provides spacing from the temperature and city name.
Fetching and Displaying Weather Data
Now, let's dive into the JavaScript code that fetches and displays weather data from the OpenWeatherMap API.
// API key provided by OpenWeatherMap
const apiKey = "YOUR_API_KEY";

// Selecting HTML elements
const searchBox = document.querySelector('.search input');
const searchBtn = document.querySelector('.search button');
const apiUrl = `https://api.openweathermap.org/data/2.5/weather?&units=metric&q=`;

// Function to fetch and display weather data
async function checkWeather(city) {
    const response = await fetch(apiUrl + city + `&appid=${apiKey}`);
    const data = await response.json();

    // Display weather information
    document.querySelector(".city").innerHTML = data.name;
    document.querySelector(".temp").innerHTML = Math.round(data.main.temp) + "°C";
    document.querySelector(".humidity").innerHTML = data.main.humidity + "%";
    document.querySelector(".wind").innerHTML = Math.round(data.wind.speed) + " km/h";
}

// Event listener for search button
function searching() {
    searchBtn.addEventListener('click', () => {
        checkWeather(searchBox.value);
    });
}
searching();
Understanding the Code
The provided API key is stored securely in the
apiKeyvariable.HTML elements for the search box and search button are selected using the
querySelectormethod.The OpenWeatherMap API URL is structured in the
apiUrlvariable, incorporating query parameters for units and city name.The
checkWeatherfunction asynchronously fetches weather data by combining the API URL, city name, and API key. The fetched JSON data is then displayed in designated HTML elements.The
searchingfunction adds an event listener to the search button. When clicked, it triggers thecheckWeatherfunction with the value from the search input.
Conclusion
By following this tutorial, you've crafted a fully functional weather app that harnesses the power of JavaScript and the OpenWeatherMap API. This project demonstrates the potential of dynamic web development and the integration of APIs to enrich user experiences. Remember that this app can serve as a starting point for further expansion—whether you're interested in refining the user interface, integrating additional features, or exploring other APIs. Through the creative fusion of code and data, you've built a tool that empowers users to access crucial weather information with just a few clicks. Happy coding and exploring the world of web development!


